A blog I religiously follow by Dana, Craftyminx, is hosting a craft supply challenge! This week, the supply is glitter. It's a craft supply I have plenty of and I want to add to everything! Although I try to restrain myself, sometimes a girl's got to add glitter... that was this case this past Valentine's day.
I briefly showed these in my older post. But I want expand the post to show you how I made the 3'd glitter X's and O's I put as decoration for the Valentine's day pie I made.
These instructions are for 2 X's and 2 O's.

Materials:
Paint
Paintbrush
Tracing paper (I used plain, ruled paper) - 1 piece
Thick cardstock (I used watercolor paper) - 1 piece
Scissors and/or Xacto knife
Glue
Glitter
Toothpicks
Pencil
Ruler
Tape
Instructions:
1.
 Measure and draw the shapes you'd like to cut out on tracing paper or flimsy ruled paper. In this case, I measured and cut an X shape and an O shape. I made them about 3" tall.
2. Tape the tracing shapes onto cardstock and trace the shapes. Make and cut 4 shapes of each - 4 X's and 4 O's - two will go to each piece, making the shapes thick and able to hold a toothpick in the middle.
3. Next, glue the shapes together - making 2 X's and 2 O's. Wait for the glue to dry - place the shapes under a book to let them set flat.

4. Paint the shapes the desired colors - make sure to get both sides! Wait for the paint to dry.
5. Using glue (I used rub
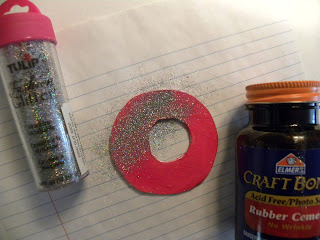
 ber cement, but a glue stick or mod podge will do!), spread an even thin layer of glue on the side you will be adding glitter to. After applying glue to one shape, quickly add your glitter! I used my extra piece of white ruled paper to catch the extra glitter so I could reuse the unused glitter. Wait for the glittered sides to dry, and flip over and repeat if you'd like to apply to the back sides as well!
6. Once the shapes are all dry, insert a toothpick in between the two pieces of card stock of each shape.

7. Decorate your cake, pie, cupcakes or brownies with your special decorations :) I like how the glitter mimics the crispy cooked sugar on top of the cherry pie!


