Friday, June 8, 2012

Craft room!

Our roommate moved out last weekend. Which means I now have a craft space back! No more cramping in the living room, making a mess and getting mad at myself that I hate to clean it up. The craft space doubles (or quadruples) as a guest bedroom, extra closet space for me, and music room. Most importantly, my craft space! I also have a new area to take Etsy store photos and store my goods for sale (I'll add photos later).

I haven't felt this inspired in a while... I want to run home and paint with my watercolors and listen to my records!

Also, I better get typing on those wedding invites. 4 months and 6 days!
 
I love my new paper lantern.
Close up of my desk.. I leveled and screwed in those shelves my myself. Do you know how hard that was? My arms are super sore today!


Friday, May 25, 2012

New scarves... Summer Colors!

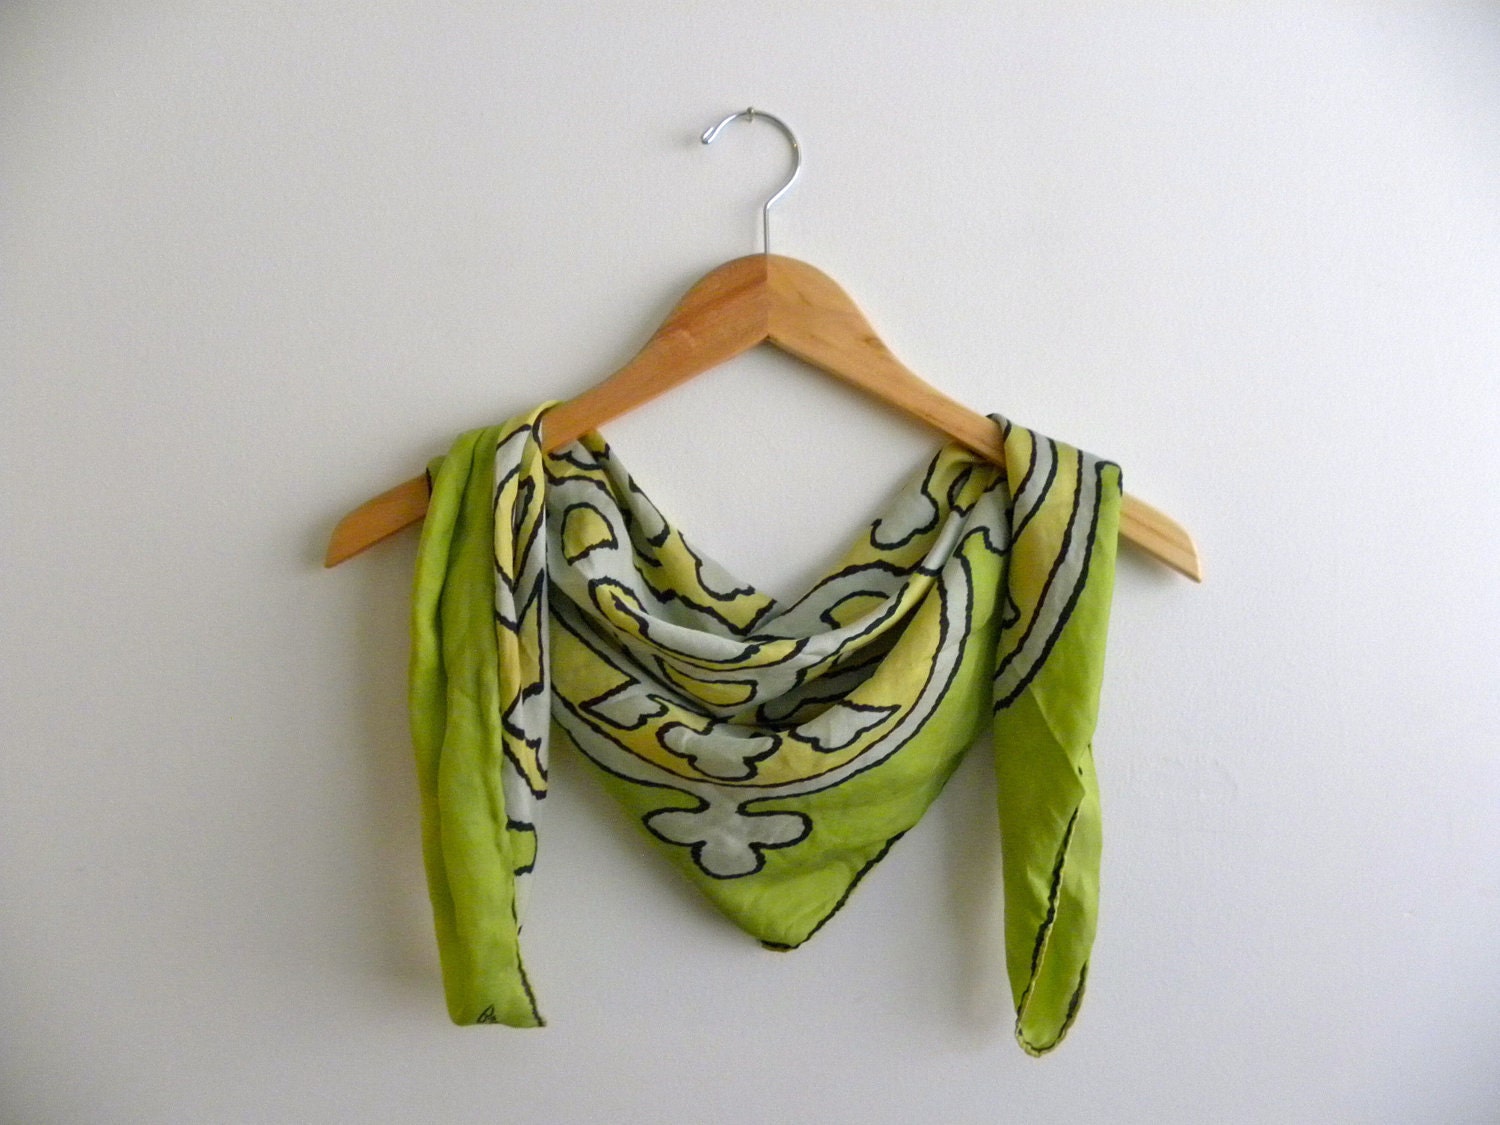
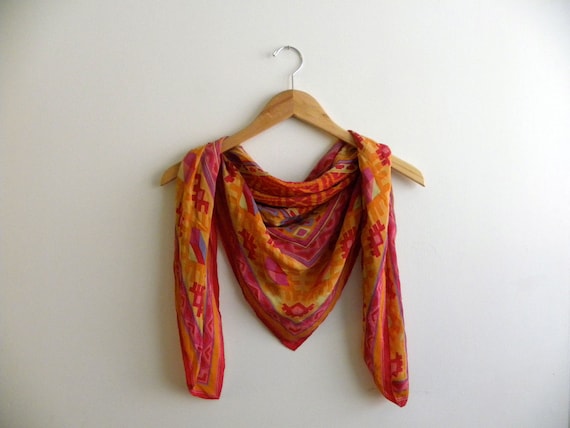
I'm so happy to post these vintage scarves I recently listed for sale in my Etsy shop  I have so much more to list, but I thought it was necessary to get the bright summer colors for sale first - I wish I could keep them all :)


This scarf by Burmel is amazing: super soft silk, and an amazing pattern in lemon and lime colors. Talk about neon colors for the summer! I can see a chic New York girl tying this around her head with a bow, but I could also see someone wearing this an an accessory to the Miami beaches. Oh, summertime!


This is a fantastic vintage silk scarf by Adrienne Vittadini. It has bright, bold summer colors: hot pink, newon orange, bright yellow, and a muted purple (to even out the bright colors!). It's also very soft and airy, working well as a small beach skirt since it's large enough (34" x 34"!).


Lastly, it's not summer without nautical prints. This vintage scarf by Leonardi features colors of cerulean blue (my favorite crayon color!) with teal and navy nautical knots. Now don't ask me how to tie a nautical knot, but everyone knows how to tie a fashionable scarf around their neck in summertime!

Tuesday, May 15, 2012

Card Making!

I've neglected making cards for a while now. I have spurts of creativity and the drive to make them, which is usually once every 6 months. Maybe I've also been a bit busier with so much wedding planning and all the different creative DIY projects I started for the wedding.

It's that time of year though... May: a million birthdays, a thousand graduations, many people moving, and... my birthday in two days!
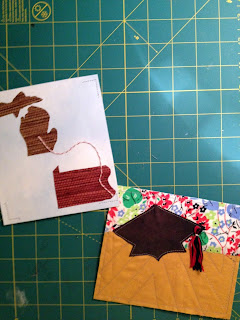
Last night, I made a card for my friend who just finished grad school, and a card for a colleague who is moving back to Michigan for med school.

I also made a card for my friend/colleague who just finished her masters program. For the cards, I honestly pick fabric and/or card stock, cut out shapes as I think of them, sew when I think it's necessary to sew, and add embroidery floss as I see fit. I always thought it would be easier to plan out a card and be picky and thoughtful when it comes to fabrics and papers, but planning the design makes me upset - I feel like I have to stick to my original plan and I get angry when it doesn't turn out like my 2D drawing. Instead, I pick a pretty fabric and I start cutting. Oh, it works so much better and keeps me motivated!


I also broke out my Singer sewing machine since my mom had it cleaned and tuned up (like a year ago!). I have been using the sport machine, but for some reason, the bobbins run out really quick and I never remember how to put thread back on the bobbin.  That's why the older machines are for me: you can do a limited number of things with them (but the most important things).. sew forward, sew backwards, thread a bobbin. I don't need much else.


Wednesday, April 11, 2012

Katerina's First Birthday

A woman I work with recently told me how much she loves Etsy and buying homemade goods. Somehow, we got to the topic of how my mom is crafty and she wore the crafty-ness off on me. I showed her some handmade greeting cards I made, and it lead to her asking me to do a commission piece for her daughter's first birthday (Katerina). The theme in Katerina's room is elephants, hot air balloons, and the colors pink and brown. She really liked the idea of a girl wearing a patchwork dress.


So, the idea was shuffeled around, and turned into an elephant wearing a patchwork dress. Then, it looked way too odd for such a small elephant (the piece has to fit in a 8" x 10" frame), so now the patchwork is in the puddle - it's raining and the elephant is stomping through the puddled (Katerina is an April baby, after all!). I also embroidered rain drops with a blue gradient embroidery floss, added embroidered touches on the elephant and the umbrella, and water colored the background of the picture.


And, as an extra for Katerina's birthday, I decided to crochet her bow clips for her strawberry blonde hair :) since my nephew won't be wearing these anytime soon, I need to give them to someone!

Wednesday, April 4, 2012

Flower time!


This just a happy spring photo, necessary to share!

Tuesday, March 13, 2012

Craft Supply Challenge - Glitter

How-to guide for making Glitter Cake decorations

A blog I religiously follow by Dana, Craftyminx, is hosting a craft supply challenge! This week, the supply is glitter. It's a craft supply I have plenty of and I want to add to everything! Although I try to restrain myself, sometimes a girl's got to add glitter... that was this case this past Valentine's day.

I briefly showed these in my older post. But I want expand the post to show you how I made the 3'd glitter X's and O's I put as decoration for the Valentine's day pie I made.


These instructions are for 2 X's and 2 O's.

Materials:
Paint
Paintbrush
Tracing paper (I used plain, ruled paper) - 1 piece

Thick cardstock (I used watercolor paper) - 1 piece
Scissors and/or Xacto knife
Glue

Glitter
Toothpicks
Pencil
Ruler

Tape


Instructions:
1.
Measure and draw the shapes you'd like to cut out on tracing paper or flimsy ruled paper. In this case, I measured and cut an X shape and an O shape. I made them about 3" tall.


2. Tape the tracing shapes onto cardstock and trace the shapes. Make and cut 4 shapes of each - 4 X's and 4 O's - two will go to each piece, making the shapes thick and able to hold a toothpick in the middle.


3. Next, glue the shapes together - making 2 X's and 2 O's. Wait for the glue to dry - place the shapes under a book to let them set flat.


4. Paint the shapes the desired colors - make sure to get both sides! Wait for the paint to dry.


5. Using glue (I used rub
ber cement, but a glue stick or mod podge will do!), spread an even thin layer of glue on the side you will be adding glitter to. After applying glue to one shape, quickly add your glitter! I used my extra piece of white ruled paper to catch the extra glitter so I could reuse the unused glitter. Wait for the glittered sides to dry, and flip over and repeat if you'd like to apply to the back sides as well!


6. Once the shapes are
all dry, insert a toothpick in between the two pieces of card stock of each shape.
7. Decorate your cake, pie, cupcakes or brownies with your special decorations :) I like how the glitter mimics the crispy cooked sugar on top of the cherry pie!


Thursday, March 8, 2012

Recycling Old Plaid Shirts


I bought some nice plaid shirts (four) for Steve two Christmas' ago... Well, they apparently weren't the best of quality, and the right elbow ripped open (about 4-5" big!) on each shirt. This could have been a combination of the quality of the shirts, but Steve also admitted that his right elbow rubs on some jutting angle of his work desk all day. I kept telling Steve to stop wearing these shirts, we need to get rid of them- but being a boy, he refused. So I finally took them out of his closet and gave him some options - we could throw them away and forget about them, or give me some time and I will re purpose the shirts. Of course he chose the re-purposing, but I knew it would take me a while to get around to fixing them up.

So I decided to make a pillow case (or as I thought, 2) out of the four shirts. So they all have snap closures and pockets on the front, so getting nice long pieces out of the material was only from the back paneling of the shirt. I cut the back pieces out and realized I only had enough material for 2/3rds of a pillowcase! So I decided to only use 3 of the shirts to make a front piece of the pillowcase, and plain brown cotton fabric for the back. I wanted to add an extra special touch, so I added the snap closures on the side you insert the pillow (so you can snap it closed and not see the pillow!). I've admitted this before, but I am the worst quilter and crafter possible only because I get SO annoyed with measuring and making nice cuts with my material. I mean, I made sure to make sure the final product fit the pillow, but to get to that point, it's all messy and guessy.

So I feel better (and hopefully Steve feels better) that his shirts have a new use (and it's a really soft pillowcase!). And, despite the messy measurements, the pillowcase fits perfectly (note to self: do not put in dryer).